Getting Started: Crop
I. OVERVIEW
The ‘RP_crop’ analysis crops an inputted image. While it can be used in any context, we suggest using it immediately after the ‘RP_stitch’ analysis to remove any residual blank space left as artifacts from its analysis.
II. HOW TO USE
First, open the ‘user_config’ text file in your ‘Root_Processing’ directory. The parameters used in ‘RP_crop’ are in the 2nd section, and there will be three parameters. In order, they are:
- image_filename: this is the full image filename (including directory) where the image is to be found.
- output_filename: this is the full image filename (including directory) where the image is to be saved. If the directory is not present, the analysis will automatically make the directory.
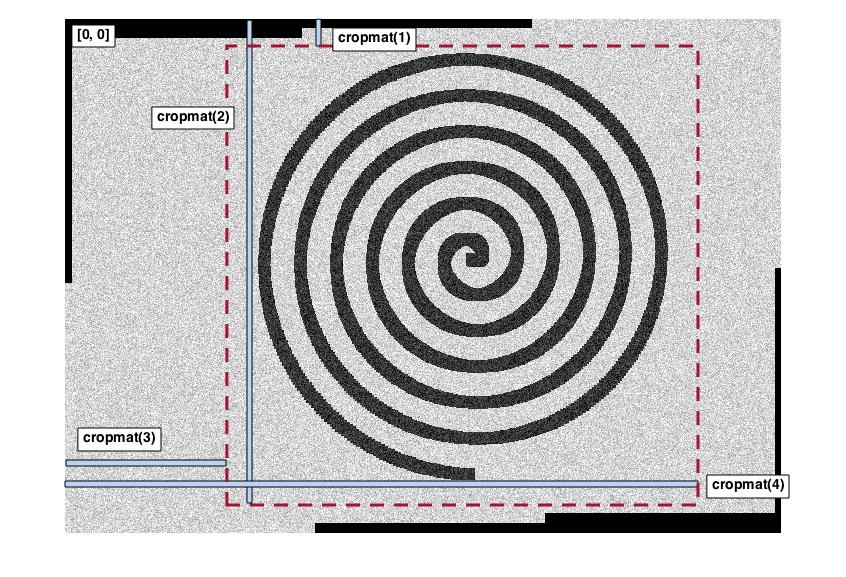
- cropmat: these are the pixel positions that specify the crop range, specifying the (1) start row, (2) end row, (3) start column, and (4) end column. The origin point (0,0) is in the top left corner. See below for a schematic:
III. RUNNING THE CODE
This analysis can be conducted using the [‘RP_crop’] string in the ‘RP_run’ module.